
ROOT-SERVER TUTORIAL
Setting up a Mail Server with mailcow


Introduction
In this tutorial you will learn how to set up and run your own mail server using mailcow.
We use mailcow dockerized for this.
This tutorial is based on the mailcow Documentation.
Requirements
- VPS with at least 6 GB RAM and 20 GB disk space (without emails)
- Debian 11 (any distribution supported by Docker CE)
- An own domain (in our example
example.com).
Step 1 - Preparation: Packages and Docker
First, we update the package lists and install git and curl:
apt update && apt upgrade
apt install git curl
Then, we install Docker and docker-compose:
curl -sSL https://get.docker.com/ | CHANNEL=stable sh
systemctl enable --now docker
curl -L https://github.com/docker/compose/releases/download/$(curl -Ls https://www.servercow.de/docker-compose/latest.php)/docker-compose-$(uname -s)-$(uname -m) > /usr/local/bin/docker-compose
chmod +x /usr/local/bin/docker-compose
Step 1.1 - Preparation: Domain and hostname
Now we open the DNS management of our domain (in this example we use Cloudflare and create a new A record.
As type we choose A,
for name (subdomain) we write mail,
and for IPv4 address we specify the IPv4 address of our server,
we set the proxy status to DNS only (disabled).
If you want to use IPv6, repeat this procedure choosing an AAAA Record Type and point it to your IPv6 address.

On our server, we set our domain as the hostname:
hostname mail.example.com
echo "mail.example.com" > /etc/hostname
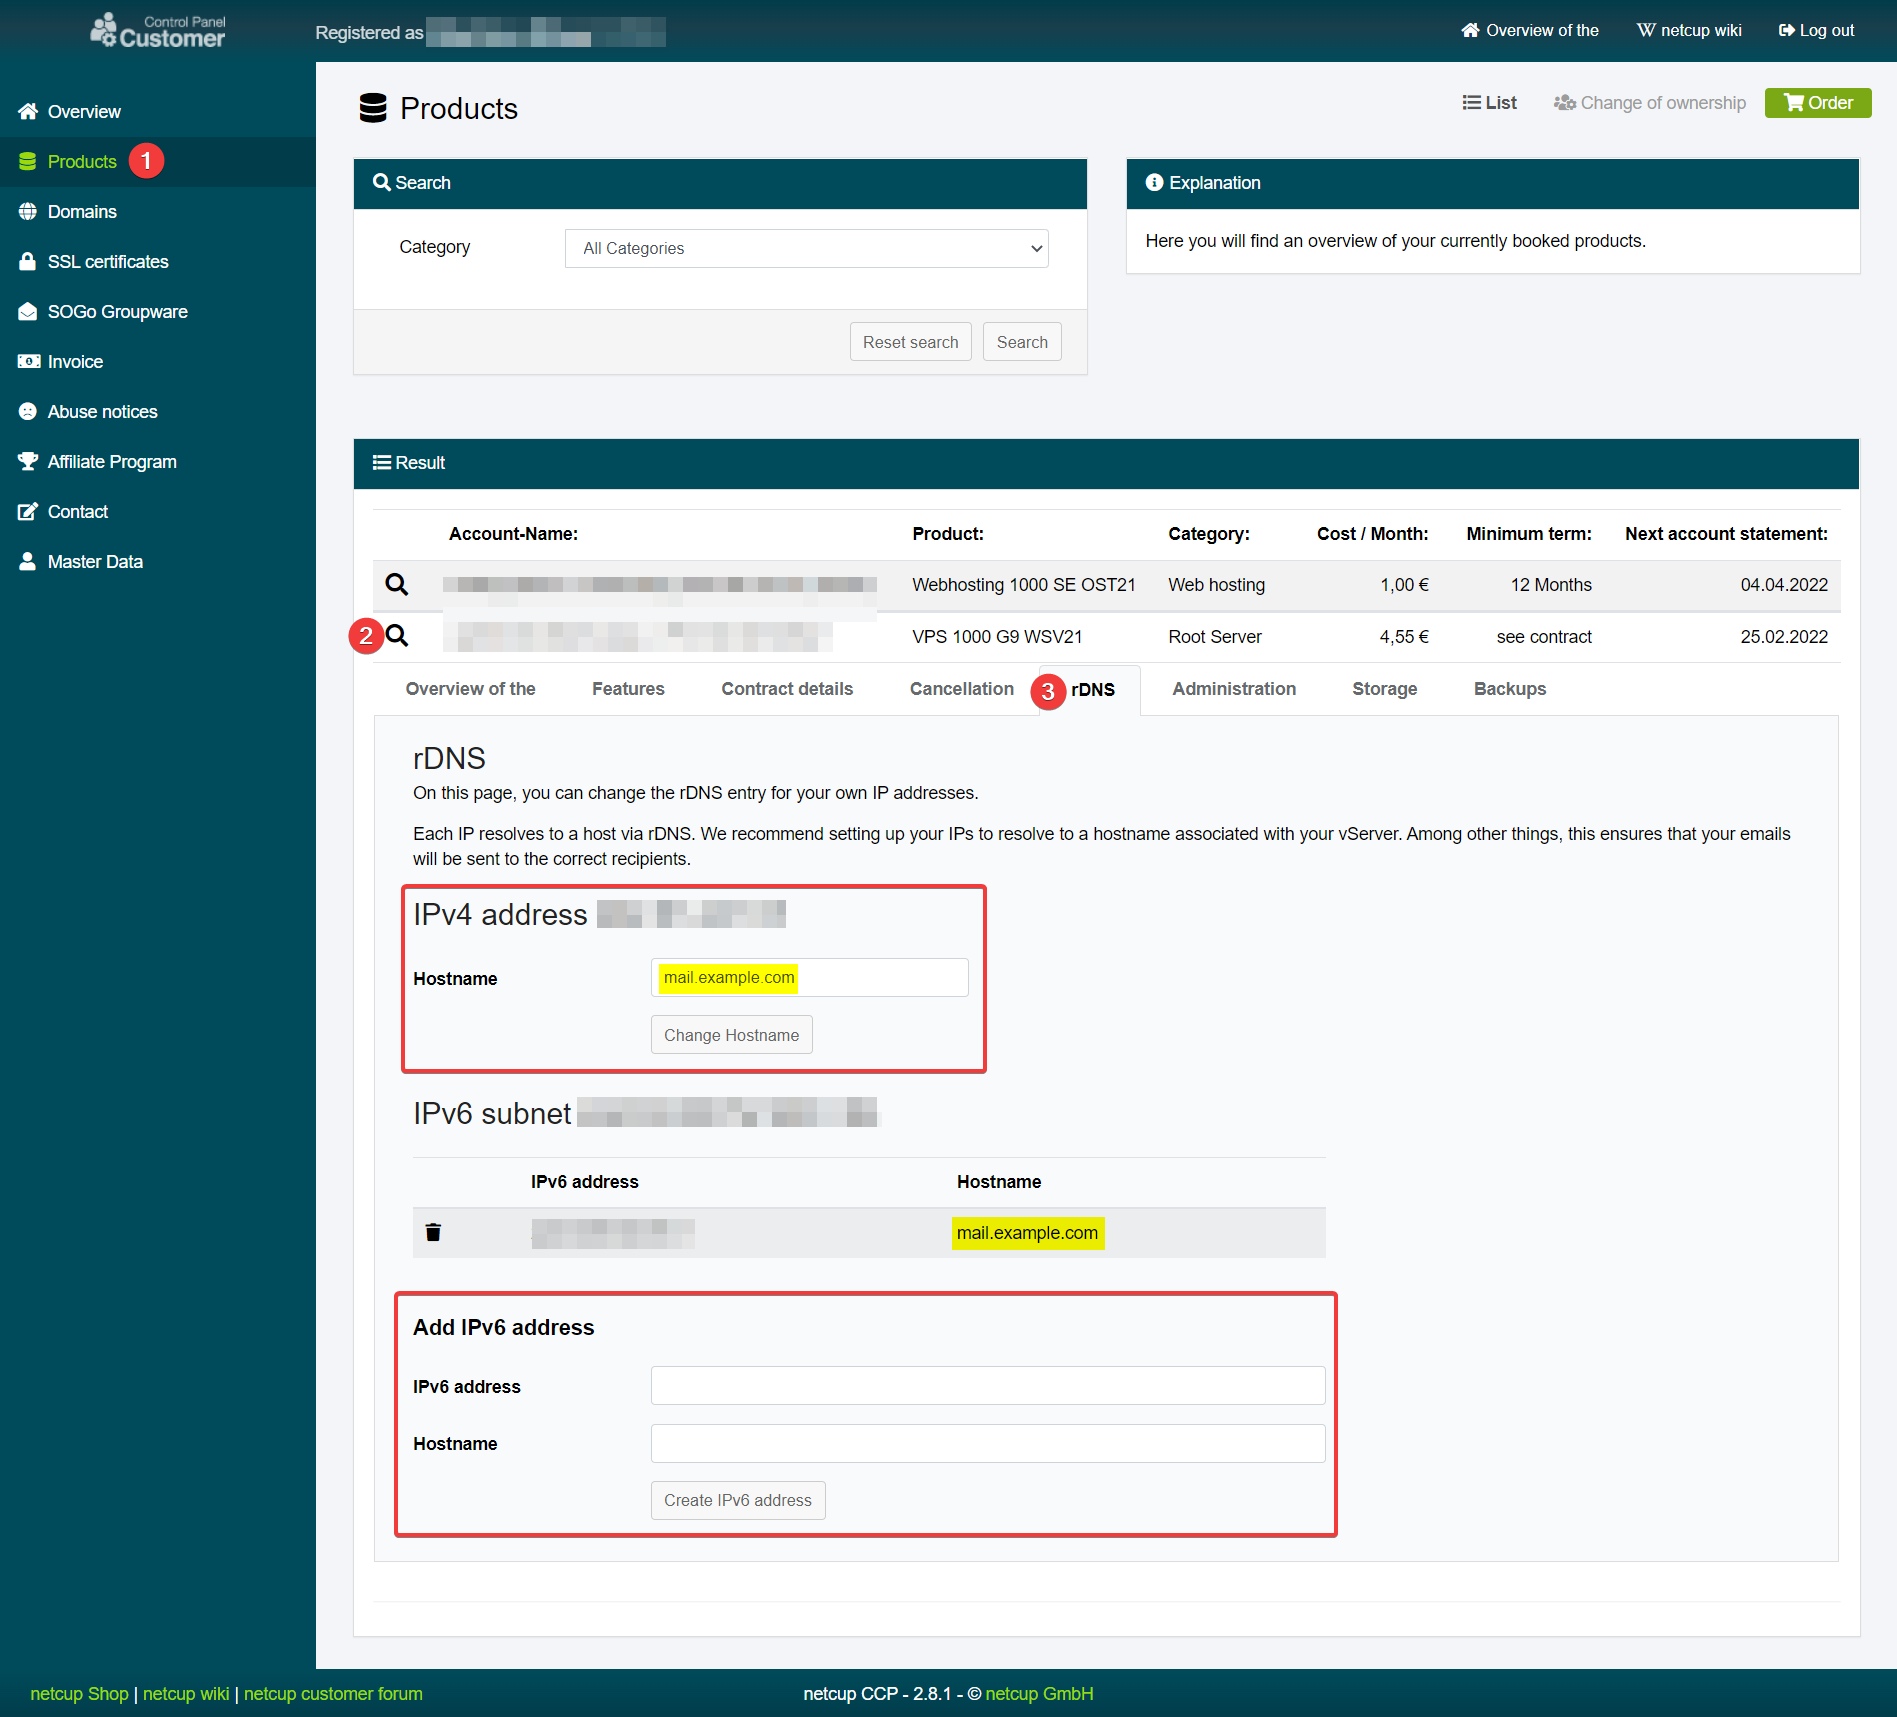
Next, we have to set an rDNS/PTR record for our server IP address in the netcup customer control panel:
Step 2 - Clone the mailcow repository
We switch to the folder /opt
cd /opt
and clone the latest version of mailcow:
git clone https://github.com/mailcow/mailcow-dockerized
Step 3 - Configure mailcow
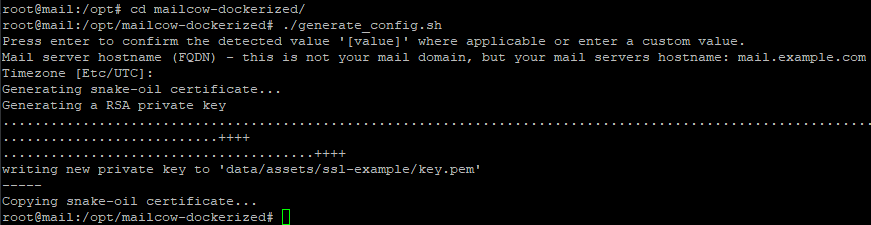
To configure mailcow, we change to the mailcow directory and generate the mailcow.conf:
cd mailcow-dockerized
./generate_config.sh
We are asked for our mail server hostname (FQDN), here we enter our hostname from step 1.1.
Step 4 - Start mailcow the first time
Now we have all the basics configured and can start mailcow for the first time:
docker-compose pull
docker-compose up -d
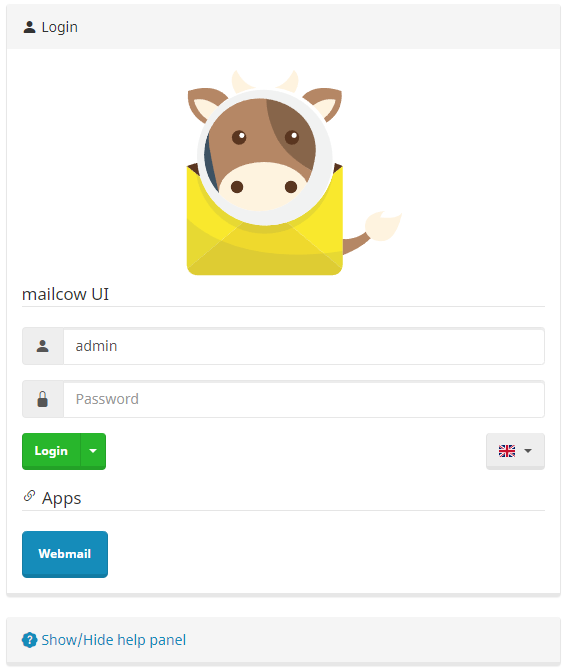
After a few seconds, we find the mailcow webinterface at https://mail.example.com.
To log in, we use admin (username) and moohoo (password).
Step 4.1 - Change mailcow admin password
It is important that you change the admin password as soon as possible!
Go to Access and click on Edit for your admin user, there you can set a new password:

Step 5 - Setting up a new domain: mailcow
To be able to send and receive emails, we need to add the domain in mailcow.
For this we go to the webinterface and navigate to Configuration => Email Setup and click Add domain:
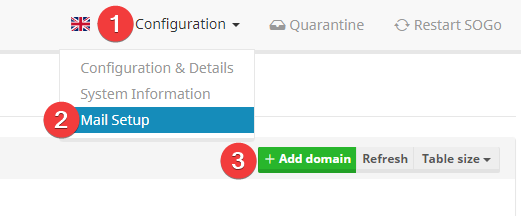
There we enter our domain example.com and click Add domain and restart SOGo.

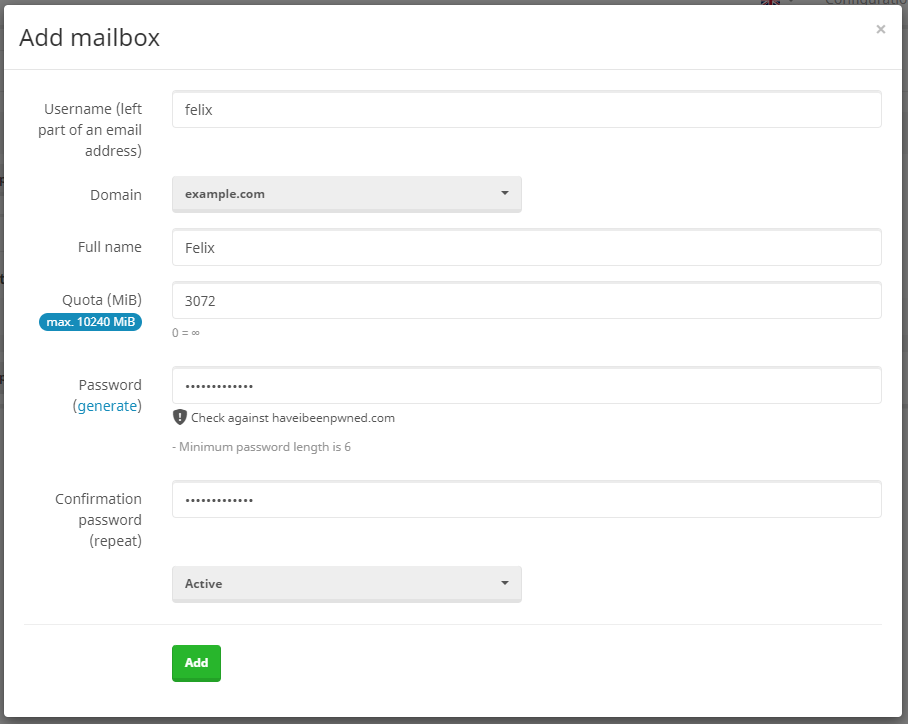
To create a new mailbox, we go to Mailboxes and click Add mailbox:

Here we enter a Username (left part of the email address) and set a password:
Step 5.1 - Setting up a new domain: DNS
In order to be able to receive and send emails, we also have to create some DNS records for the domain.
For this we switch back to the DNS management of our domain and create the following records:
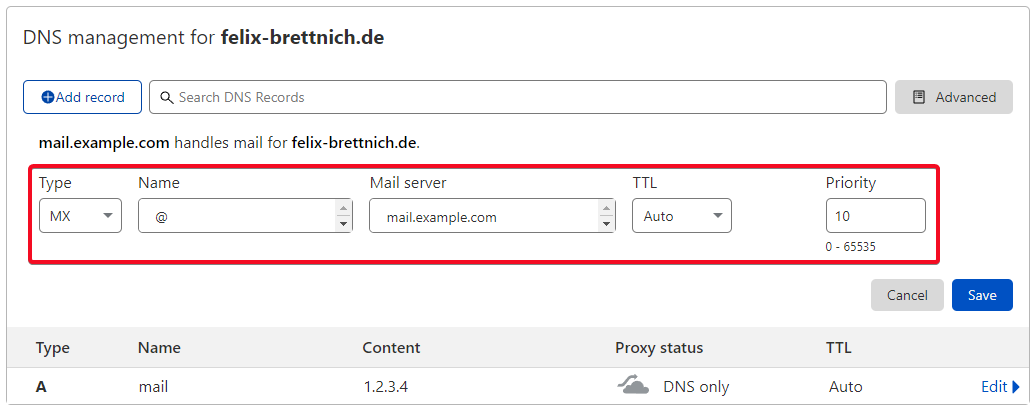
MX Record
Type: MX
Name: @ / example.com
Mailserver / Target: mail.example.com
Priority: 10
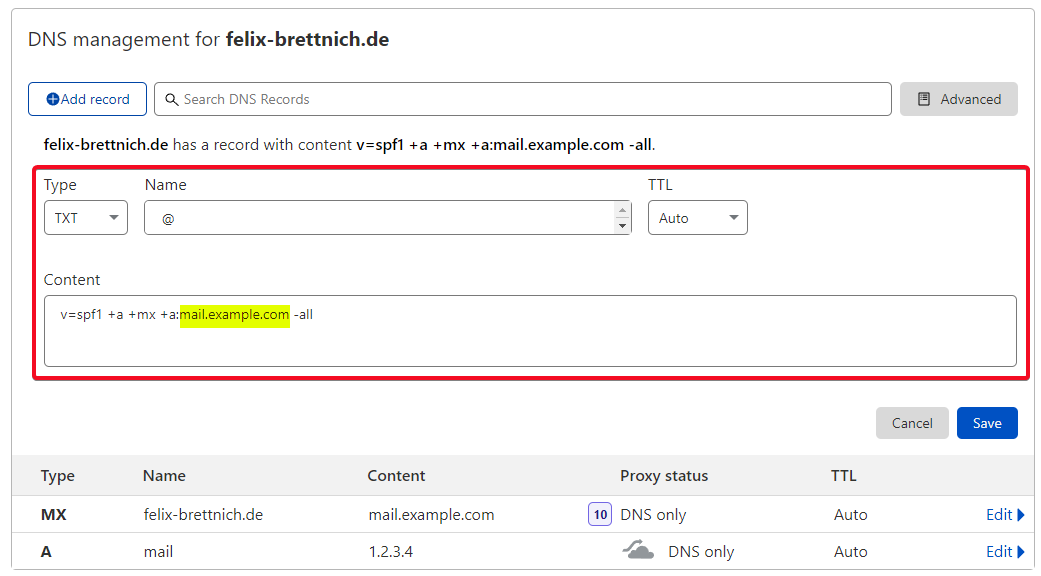
TXT Record (SPF)
Type: TXT
Name: @ / example.com
Content: v=spf1 +a +mx +a:mail.example.com -all
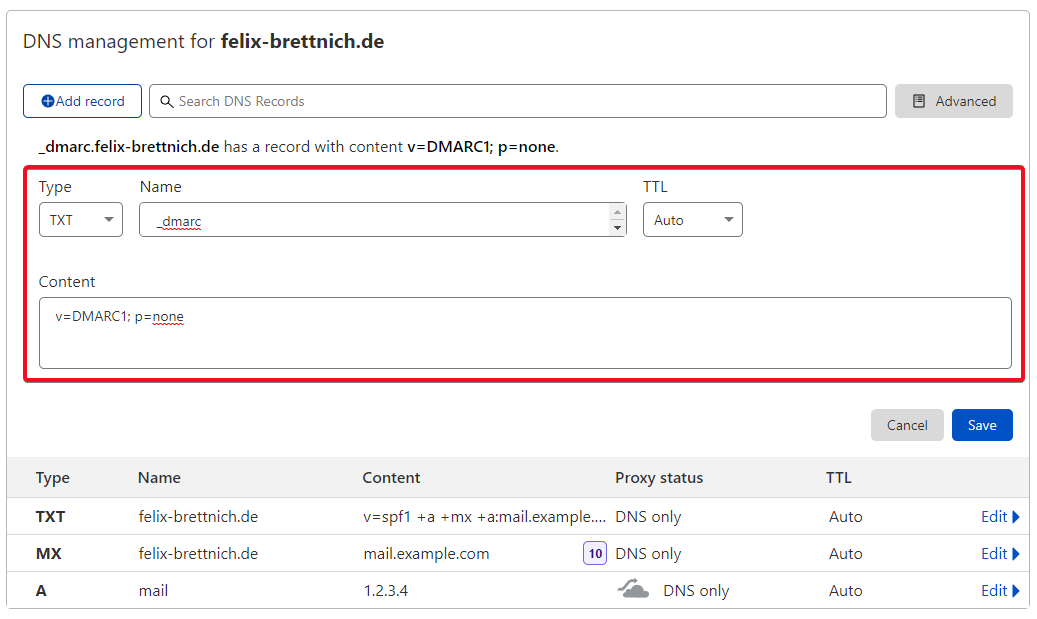
TXT Record (dmarc)
Type: TXT
Name: _dmarc
Content: v=DMARC1; p=none
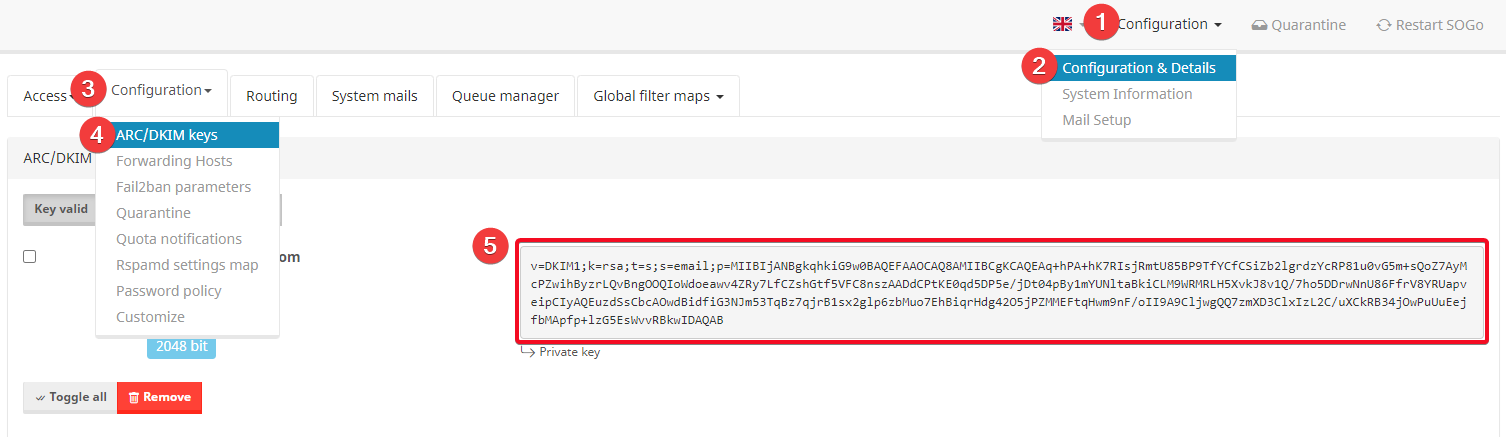
For the next DNS entry we need further information from the mailcow webinterface.
For this we navigate to Configuration => Server Configuration => Configuration => ARC/DKIM-Keys.
There we copy the DKIM public key of our domain:
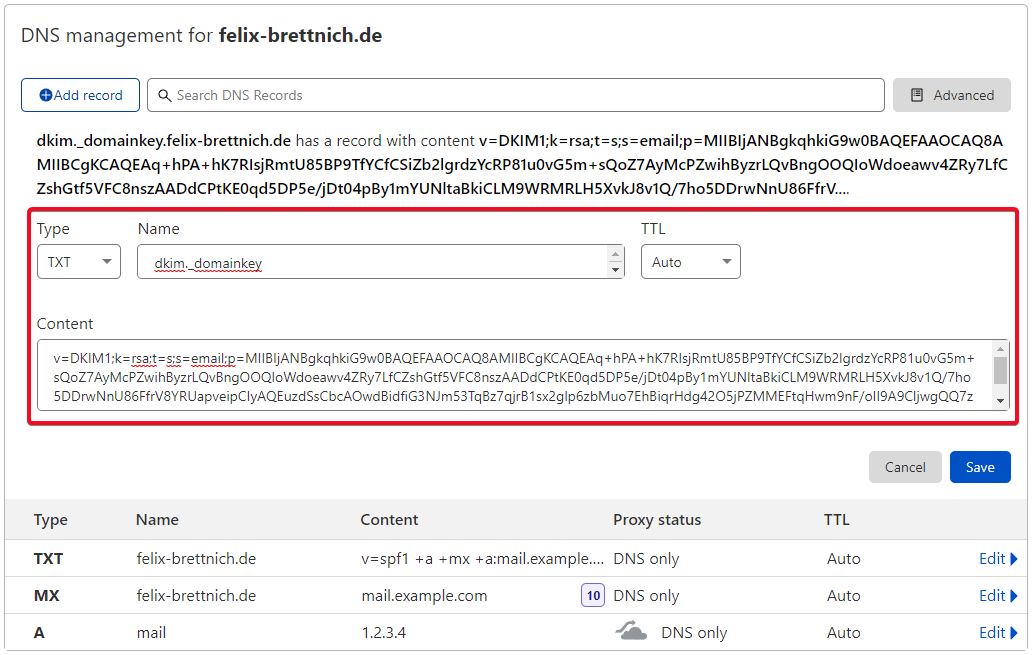
TXT Record (dkim)
Type: TXT
Name: dkim._domainkey
Content: <Our DKIM public key from the mailcow webinterface>
Conclusion
Great! You have successfully set up and configured your own mail server with mailcow.
You can now send and receive emails with your own domain.
The best way to test this is to open the webmail client in mailcow:

To log in, use your username / email and the password you defined.
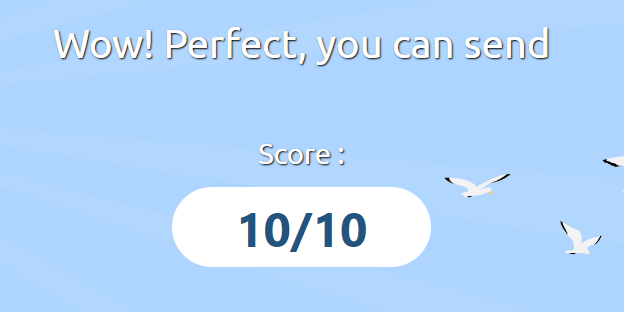
For example, you can send an email to mail-tester.com and see what score you get. Ideal would be 10/10.
License
Permission is hereby granted, free of charge, to any person obtaining a copy of this software and associated documentation files (the "Software"), to deal in the Software without restriction, including without limitation the rights to use, copy, modify, merge, publish, distribute, sublicence, and/or sell copies of the Software, and to permit persons to whom the Software is furnished to do so, subject to the following conditions:
The above copyright notice and this permission notice shall be included in all copies or substantial portions of the Software.
THE SOFTWARE IS PROVIDED "AS IS", WITHOUT WARRANTY OF ANY KIND, EXPRESS OR IMPLIED, INCLUDING BUT NOT LIMITED TO THE WARRANTIES OF MERCHANTABILITY, FITNESS FOR A PARTICULAR PURPOSE AND NONINFRINGEMENT. IN NO EVENT SHALL THE AUTHORS OR COPYRIGHT HOLDERS BE LIABLE FOR ANY CLAIM, DAMAGES OR OTHER LIABILITY, WHETHER IN AN ACTION OF CONTRACT, TORT OR OTHERWISE, ARISING FROM, OUT OF OR IN CONNECTION WITH THE SOFTWARE OR THE USE OR OTHER DEALINGS IN THE SOFTWARE.
Contributor's Certificate of Origin
By making a contribution to this project, I certify that:
-
The contribution was created in whole or in part by me and I have the right to submit it under the license indicated in the file; or
-
The contribution is based upon previous work that, to the best of my knowledge, is covered under an appropriate license and I have the right under that license to submit that work with modifications, whether created in whole or in part by me, under the same license (unless I am permitted to submit under a different license), as indicated in the file; or
-
The contribution was provided directly to me by some other person who certified (a), (b) or (c) and I have not modified it.
-
I understand and agree that this project and the contribution are public and that a record of the contribution (including all personal information I submit with it, including my sign-off) is maintained indefinitely and may be redistributed consistent with this project or the license(s) involved.