
ROOT-SERVER TUTORIAL
Backup and migrate webhostings


Introduction
This tutorial explains how to back up and move applications that are operated in Plesk (WebhostingControlPanel(WCP)). These instructions can be used for the following netcup products:
- Webhosting
- Reseller Webhosting
- managed private server
WordPress is used as a reference in this guide, as this application is very popular and widespread. Please note that this tutorial is not necessarily completely applicable to your own application and that the documentation of the corresponding application should also be taken into account if possible. If you use your own plugins or themes, further steps may be necessary.
Warning
You are always responsible for your own content and therefore also for the backup of this content.
If you need help, you are welcome to contact the netcup forum, where customers are happy to help each other and exchange Notermation: https://forum.netcup.de
Step 1 - Order a new hosting
Note
This step is only necessary if you want to migrate to a hosting that does not yet exist. This step can also be skipped if only a backup of the application/website is to be created.
When moving to a reseller web hosting or a managed private server, corresponding subscriptions and service packages must be created, which cannot be transferred from the previous hosting! This is not necessary if the corresponding products are operated as power users.
Step 2 - Switch application/website to maintenance mode
Note
This step is not absolutely necessary. However, it is recommended for applications that support this to prevent subsequent errors.
When installing WordPress via the WordPress Toolkit, the toolkit itself can be used for this >purpose. To do this, click in Plesk (WebhostingControlPanel(WCP)) on
WordPress -> Maintenance mode(for the corresponding website)
This can be individualized using the symbol on the far right next to Maintenance mode.

Step 3 - Backup of files
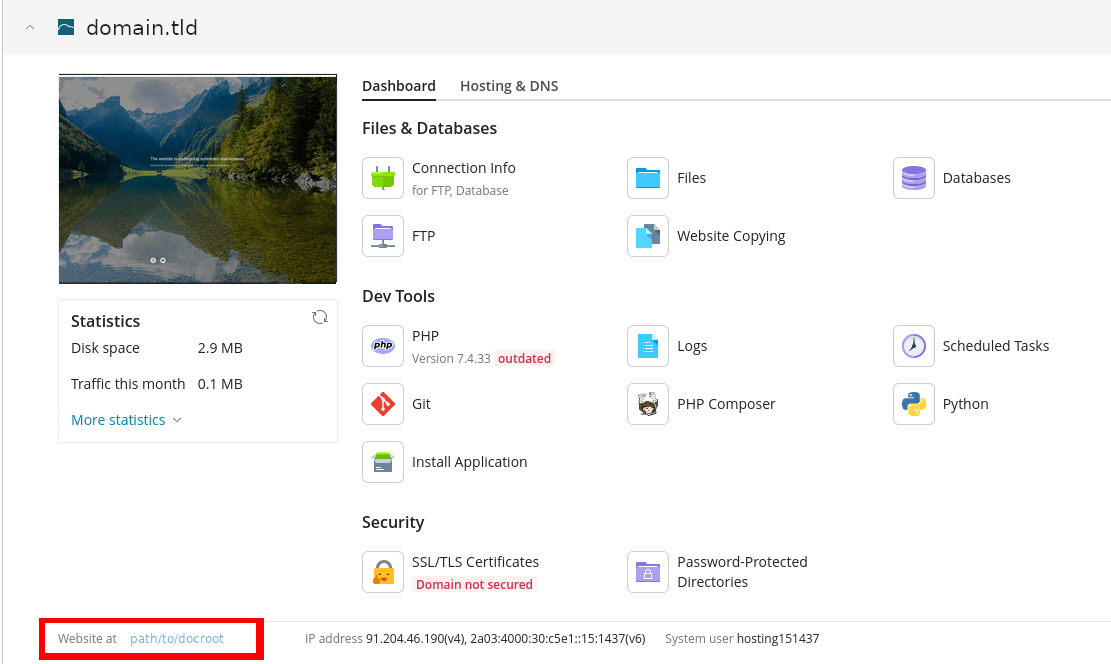
Find out the document root of the domain
Note: The document root is the directory in which the files of your application/website are located.
Unter Websites & Domains -> bei der Domain wird diese am unteren Rand angezeigt:
Plesk Filemanager
Call up the document root of your domain. Then tick all files in the directory. Now you can create a .zip via Archive -> Add to Archive.
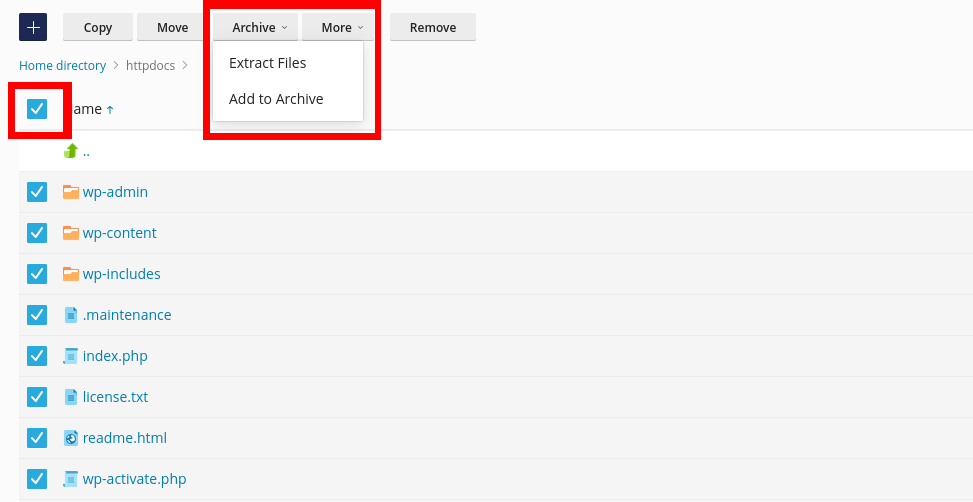
Now you can click on the menu next to the created .zip file and click on download.

FTP-Access
If you do not have your access data, you can specify access in Plesk under "Websites & Domains" using one of the following symbols:

Only the main user can be edited under Connection info or under Web Hosting Access.
Make a note of the following data in this step:
- IPv4 or IPv6 Adresse (IPv4 is recommend)
- Username (Example: hosting12496)
- Password
Tip:
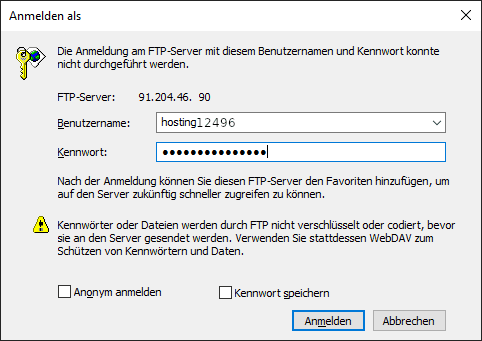
Establish FTP connection
Note: There are special clients for FTP access. In most operating systems, however, the file manager can be used for this purpose.
To do this, open the file manager of your operating system and then the address bar. To edit the address bar in Windows, you can click on the following key combination: CTRL + L
Then enter one of the following points in the address line:
ftp://IP-ADRESSEsftp://IP-ADRESSEftp://BENUTERNAME@IP-ADRESSEsftp://BENUTZERNAME@IP-ADRESSE
Note: sftp only possible for the standard FTP user!

The password and user name should then be requested:
Download files
If the login was successful, the base directory of the hosting should now be displayed. Then navigate to the document root and copy all files and folders locally to your computer.
Note: This may take some time!
Step 4 - Database backup
Note: Not every application has a database. If you are not sure about this, check the documentation for the application you are using.
Determine correct database
Only your application itself can tell you which database belongs to your application/website. You can usually find this information in the configuration file of the corresponding application. For WordPress, this would be the file wp-config.php in the document root of the domain. The database name can then be read from the following line:
define( 'DB_NAME', 'k123456_wp_kefj2' )
k123456_wp_kefj2 is the name of the database in this example.
Create and export an Dump of the database
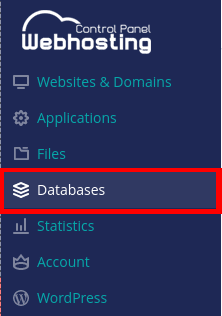
Now click on 'Databases' in the left sidebar in Plesk (WebhostingControlPanel(WCP)). The database with the name determined in the last step should be available there.
Then click on 'Export Dump'.

A pop-up should now appear in which you can select the directory in which the image can be saved. You can also check the box to automatically download the image afterwards.
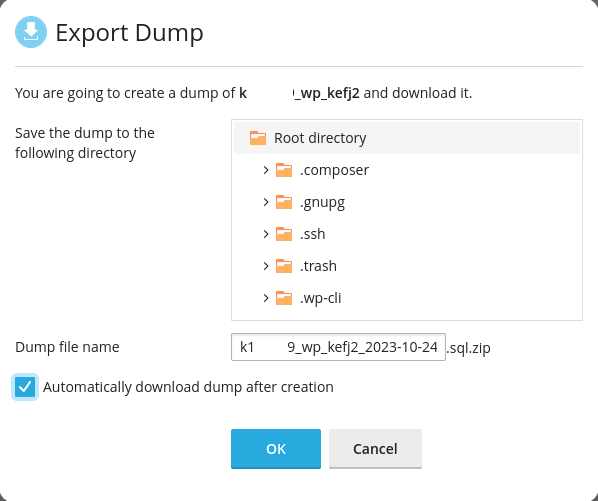
Note: If the download fails, the image can be downloaded via FTP. See step 3.
Step 5 - Backup of e-mails
Note: This step is only necessary if e-mails are available.
netcup itself does not offer a tool to create backups of emails. However, you can use a mail client such as Outlook or Thunderbird for this purpose. As this differs from client to client, this tutorial does not go into this point in detail. We recommend that you check the documentation of the mail client provider. Alternatively, the forum will be happy to help you:
However, if you are migrating to a reseller web hosting or a managed private server, you can use https://mailsync.netcup.net/. To do this, the mailbox for the email address must be created on the new hosting.You can find instructions in the HelpCenter
Note: This does not create a backup!
Note: The tool cannot be used to move from web hosting to web hosting! A backup must be created via the client.
First conclusion
You have now successfully created a manual backup of your application/website.
The following steps explain how to migrate the domain, files and database to the new hosting.
Step 6 - Assign domain to the new hosting
Migration to a new web hosting (own account)
In order to be able to use the domain in the new hosting, the domain must be assigned to it.
This can be done via the CustomerControlPanel(CCP) -> Domains -> Magnifying glass in front of Domain -> Administration.
You can find instructions in the HelpCenter
Important:
If the domain is currently assigned to a hosting, the assignment will be canceled. This will delete all files, databases and email addresses assigned to the domain. Please back up all data beforehand! The deletion does not affect any other domains (if these are cleanly separated)
Migration to a new web hosting (different account)
In this case, the domain must be transferred to the new account via AuthCode. You can obtain the AuthCode via CustomerControlPanel(CCP) -> Domains -> Magnifying glass in front of Domain -> Cancellation.
The domain must then be ordered in the new account via CustomerControlPanel(CCP) -> Domains -> green order button with the AuthCode.
Instructions in the HelpCenter
Note: If the domain can be managed as an inclusive domain, you can check the Inclusive domain option when ordering.
Important:
If the domain is currently assigned to a hosting, the assignment will be removed. This will delete all files, databases and email addresses assigned to the domain. Please back up all data beforehand! The deletion does not affect any other domains (if these are cleanly separated)
Migration to a reseller web hosting or to a managed private server
With reseller web hosting or a managed private server, the domain can be created directly in Plesk and the move can be carried out more easily while the site is still accessible on the old hosting. The domain can be created directly in Plesk for this purpose.
An assignment via the CustomerControlPanel(CCP) is not necessary.
Step 7 - Create database in new hosting
Create database
A new and empty database must be created so that the database previously backed up in step 4 can be imported into the new hosting. To do this, the administration must first be called up in the same way as when backing up the database in the old hosting:
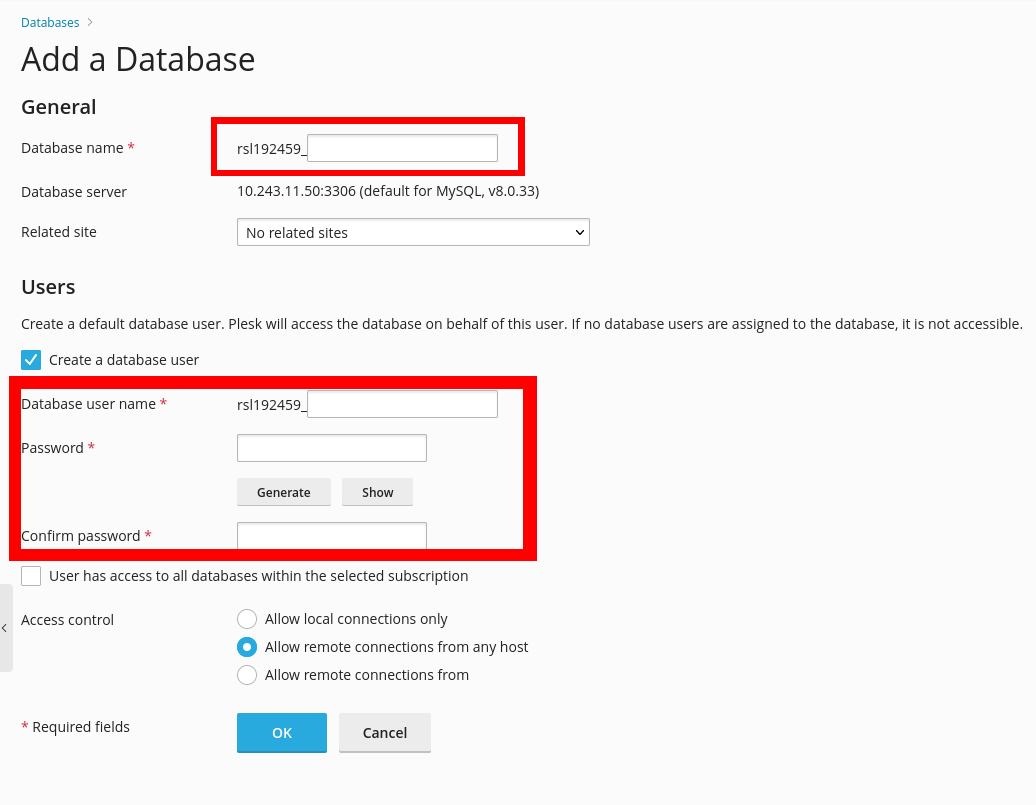
The following button should then be displayed:

Now the red fields must be filled in.
- in the first field, a name for the database is selected. This can be freely chosen.
- in the lower field, a database user is created who is to access the database. The name and password can be freely selected here.
Important:
Make a note of the database name, the name of the database user and their password, as this will be required later for the application.
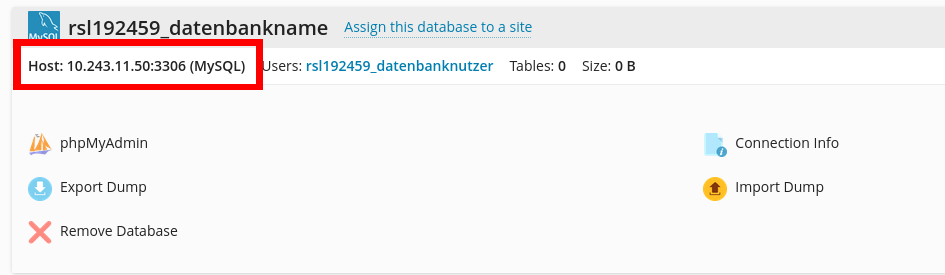
Find out the IP of the database
Also make a note of the IP of the database server. This is displayed directly under the name of the database created.
Step 8 - Import database
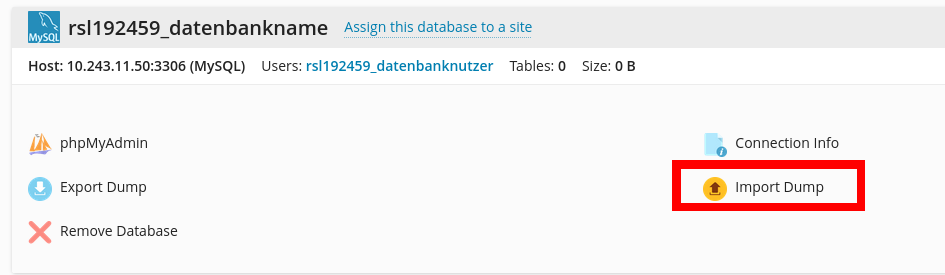
Now that a database is available, the saved database can be imported.To do this, click on "Import Dump".
In the following popup, select the file with the extension .sql.zip.
Note:
The import may now take some time.
Step 9 - Upload files
Important
Make sure that there are no files in the directory. If there are any, delete them first.
Plesk file manager
Open the document root of your domain. Then click on the blue symbol with the plus and then on Upload files
If you have uploaded the website as .zip, then unzip the files by clicking on the zip and then on Archive -> Extract files.
FTP
Proceed as described in step 3 for the new hosting. Except that you do not download any files, but upload the files previously saved in step 3.
Step 10 - Tell the application the correct database
Now you have to change your application to the correct database. If this is not done, it will continue to try to access the database of the old hosting. This is usually done directly in a file called config. For WordPress, this is wp-config.php.
Search for the following lines in this file and adjust them accordingly:
Database name:
define( 'DB_NAME', 'DATENBANK_NAME' );
Database user
define( 'DB_USER', 'DATENBANK_BENUTZER' );
Password of the database user
define( 'DB_PASSWORD', 'PASSWORT_DES_DATENBANK_BENUTZERS' );
IP of the database server
define( 'DB_HOST', 'IP_DES_DATENBANKSERVERS:3306' );
Step 11 - Deactivate maintenance mode
Finally, you should deactivate maintenance mode. For WordPress, remove the file .maintenance in the document root of the domain
Conclusion
You have now successfully backed up your website and moved it to a new hosting.
Note:
If you are using a new managed private server or reseller web hosting, don't forget to adjust your DNS settings for the domain accordingly.
Licence
Copyright (c) 2021 netcup
Permission is hereby granted, free of charge, to any person obtaining a copy of this software and associated documentation files (the "Software"), to deal in the Software without restriction, including without limitation the rights to use, copy, modify, merge, publish, distribute, sublicence, and/or sell copies of the Software, and to permit persons to whom the Software is furnished to do so, subject to the following conditions:
The above copyright notice and this permission notice shall be included in all copies or substantial portions of the Software.
THE SOFTWARE IS PROVIDED "AS IS", WITHOUT WARRANTY OF ANY KIND, EXPRESS OR IMPLIED, INCLUDING BUT NOT LIMITED TO THE WARRANTIES OF MERCHANTABILITY, FITNESS FOR A PARTICULAR PURPOSE AND NONINFRINGEMENT. IN NO EVENT SHALL THE AUTHORS OR COPYRIGHT HOLDERS BE LIABLE FOR ANY CLAIM, DAMAGES OR OTHER LIABILITY, WHETHER IN AN ACTION OF CONTRACT, TORT OR OTHERWISE, ARISING FROM, OUT OF OR IN CONNECTION WITH THE SOFTWARE OR THE USE OR OTHER DEALINGS IN THE SOFTWARE.
Contributor's Certificate of Origin
By making a contribution to this project, I certify that:
-
The contribution was created in whole or in part by me and I have the right to submit it under the licence indicated in the file; or
-
The contribution is based upon previous work that, to the best of my knowledge, is covered under an appropriate licence and I have the right under that licence to submit that work with modifications, whether created in whole or in part by me, under the same licence (unless I am permitted to submit under a different licence), as indicated in the file; or
-
The contribution was provided directly to me by some other person who certified (a), (b) or (c) and I have not modified it.
-
I understand and agree that this project and the contribution are public and that a record of the contribution (including all personal information I submit with it, including my sign-off) is maintained indefinitely and may be redistributed consistent with this project or the licence(s) involved.