
ROOT-SERVER TUTORIAL
Installing Debian/Ubuntu with Debootstrap


Introduction
Upgrading Debian or Ubuntu via apt can sometimes be stressful. What if a package reports an error halfway through and you just can't figure out what the problem is while all your websites and services are down?
A better approach would be to use an installation medium to simply add a second installation and reconfigure everything there. This is a bit safer, but can also result in a long downtime while you reconfigure all the services in your new installation. On the upside, if something goes wrong, you can always go back to your previous installation.
There is actually a third option: debootstrap
With debootstrap, you can install and prepare a completely new system while running your previous installation. This tutorial will show you how to upgrade/reinstall your OS on your netcup vServer.
Requirements
This tutorial was written for Debian 10 (Buster) as the starting system and Debian 11 (Bullseye) as the new system. But it works for any Linux that can run debootstrap. Switching between Debian and Ubuntu as the target system is also possible.
For this tutorial a terminal access, like provided in netcup SCP, is required. If your hoster does not offer such a feature, rescaling your boot partition is much more complicated. Please also refer to Reference 2 for rebooting your old system in case of error.
References
This tutorial was heavily influenced by:
- https://www.debian.org/releases/stretch/amd64/apds03.html.en (Ref1)
- https://gist.github.com/varqox/42e213b6b2dde2b636ef (Ref2)
Consider LVM
In this tutorial, we will create all partitions without LVM. This in turn leads to a setup where it is difficult to scale partitions out of the order, i.e. each partition can only be scaled "to the right" and free space that is not to the right of a partition cannot be used. LVM gets around this problem at the cost of some performance. If there is a reliable benchmark out there for LVM impact on netcup vServers, please let me know.
Consider LUKS
Like any physical or virtual drive, an unencrypted drive can be mounted into any other system and is available just as it is in your vServer, i.e. all data can be read. The only countermeasure is to encrypt your hard drive with LUKS (or any other encryption mechanism). Again, this is not part of this tutorial. If you encrypt your partitions, you will need to have an extra partition for /boot outside of the encrypted area to enable Grub to boot your system. There are plenty of other options out there to make this work. As long as you do not touch your original system, this tutorial is the perfect opportunity to play with encryption.
Step 1 - Making Space
As we are going to set up the new OS parallel to the existing one, we need space. If there already exists an empty partition on your system, you can skip this step.
Working with partitions can be quite hazardous. Please be careful.
If you haven't worried too much about your vServer setup, there are good chances your layout might look something like this:
|start|[sda1 - grub][sda2 - swap][sda3 - ext4 - mounted as / - ]|end|
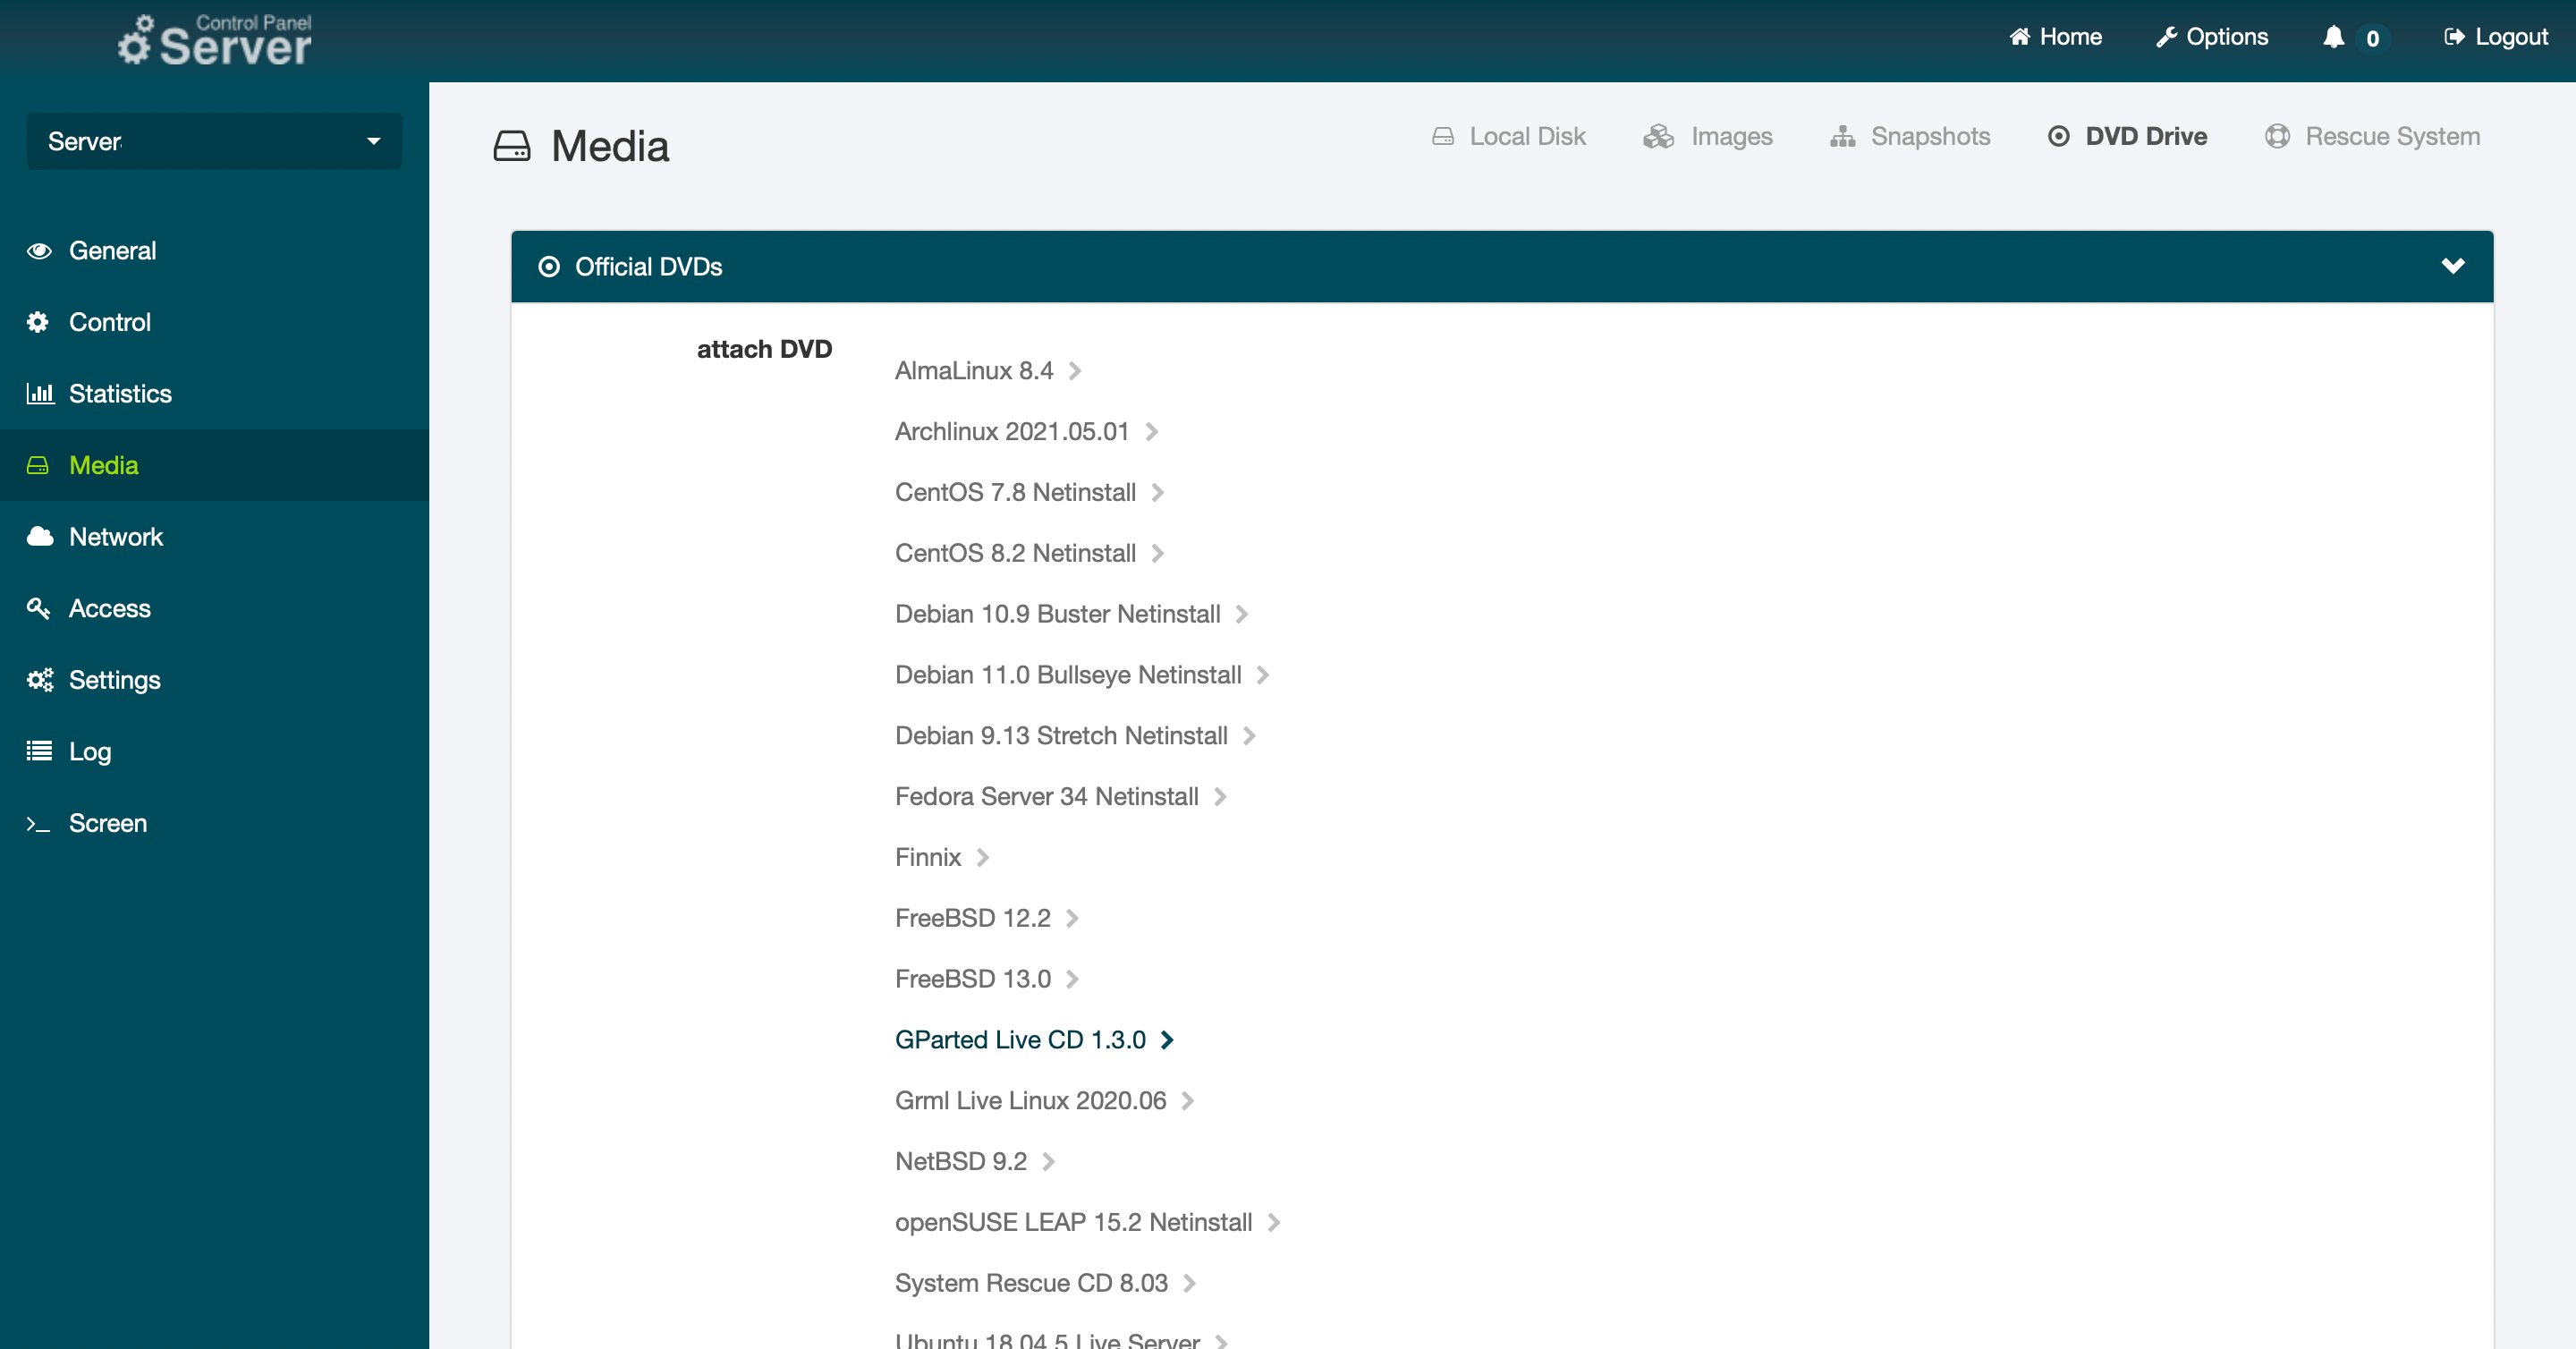
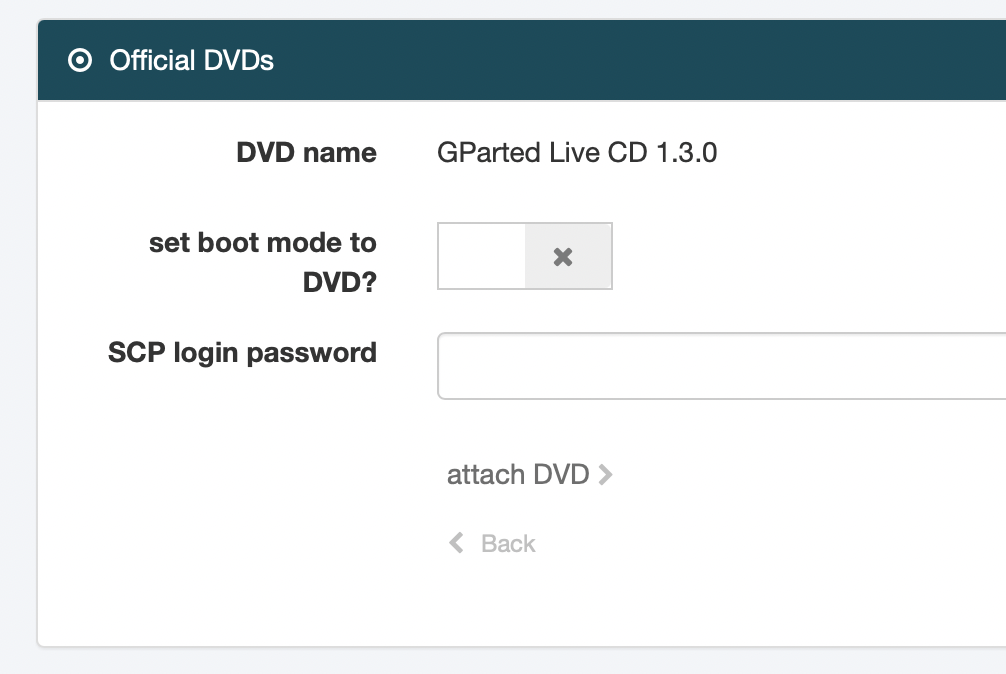
This setup is quite disadvantageous since we are not able to shrink an ext4 filesystem while it is mounted. With netcup we are lucky because in the Server Control Panel we can boot from an iso and have a console with mouse support.
For this step we will have some downtime. On my VPS 16years (with an HDD), downsizing the ext4 by around 500 GB took about 50 minutes.
Step 1.1 - Shrink existing partition
Step 1.2 - Create partition for the new system

Now create a new partition inside the new space and format it to ext4. Other formats like xfs or btrfs are possible as well, but we stick to the standard for this tutorial.
Step 1.3 - Reboot into Linux
With the new partition we can now reboot into our existing system. For that, first close the gparted GUI and then double click the red Shutdown icon. Select Reboot and confirm. You should then see a prompt to remove the gparted live cd. Disable the Boot to DVD from the scp and restart your machine with the [detach DVD] button.
Check out the name of your new partition using lsblk. If your setup was exactly like described earlier, it should be /dev/sda4. In the following steps we will call this drive /dev/sdaX.
Alternative option with less downtime
If your system contains a large enough swap partition (e.g. 4G), it is possible to reuse this part of the hard drive as a new system. In this case you disable the swap partition in the running system swapoff -a, delete it and recreate it as an ext4 to accommodate the new system. Make sure that your system has enough RAM to run without swap. Also make sure that you remove the swap entry in your /etc/fstab to avoid a long waiting time while the system is searching for the swap partition at reboot. After booting to the new system, consider resizing your old system and recreate a swap partition elsewhere.
Step 2 - Install your new base system
Create a mountpoint for your new partition:
mkdir /mnt/debinst
Mount the newly created drive via:
mount /dev/sdaX /mnt/debinst
On Debian 10, the debootstrap binary can be retrieved via:
apt install debootstrap
For other systems, download and install the binary from the Debian archive (Ref1 D.3.2.). With deboostrap installed, we can launch the installation with the command:
debootstrap --arch amd64 bullseye /mnt/debinst http://ftp.us.debian.org/debian
In this tutorial we are installing Debian 11 (Bullseye) on an amd64 machine. If you want to use a different system or architecture, you can do that with debootstrap. Debootstrap will now download all necessary binaries and initialize the base system for you. This will take a couple of seconds.
Once it is installed and you are back on your prompt, it is time to configure your new system a little bit further. For this, we are going to chroot into your new system. But before that, we want to mount some pointers of our current system to the new installation:
mount --make-rslave --rbind /proc /mnt/debinst/proc
mount --make-rslave --rbind /sys /mnt/debinst/sys
mount --make-rslave --rbind /dev /mnt/debinst/dev
mount --make-rslave --rbind /run /mnt/debinst/run

chroot /mnt/debinst /bin/bash
In the new system, we can install all features we need the way we are used to:
apt update && apt install -y ssh
Hint: If you plan on accessing your new system via SSH, use the command above to install the SSH server and client. If you do not need SSH access, you can skip step 2.3 later on.
Step 2.1 - Add backports and security updates to apt
After the installation is complete, we can populate the sources for apt with backports and security updates. First install lsb-release:
apt update && apt install -y lsb-release
Apt will occasionally remind you that it won't perform some actions because it knows that we are in a chrooted environment. After that, add the sources for your distribution with the following script:
CODENAME=$(lsb_release --codename --short)
cat > /etc/apt/sources.list << HEREDOC
deb https://deb.debian.org/debian/ $CODENAME main contrib non-free
deb-src https://deb.debian.org/debian/ $CODENAME main contrib non-free

deb https://security.debian.org/debian-security $CODENAME-security main contrib non-free
deb-src https://security.debian.org/debian-security $CODENAME-security main contrib non-free

deb https://deb.debian.org/debian/ $CODENAME-updates main contrib non-free
deb-src https://deb.debian.org/debian/ $CODENAME-updates main contrib non-free
HEREDOC
It is a good idea to check /etc/apt/sources.list manually to verify that everything is working. If everything seems fine, update your system just to be sure:
apt update && apt upgrade -y
Continue installing the software you need. For example:
apt update && apt install -y zip htop sudo ssh net-tools bash-completion screen iotop rsync
After you have installed everything you need, you can add the configuration files. These files can be edited from inside the chrooted system or you can
exit
to the main system and edit the files from there. I prefer the latter option for two reasons:
- It is possible to copy configuration files that already exist.
- There is less risk of forgetting which system you are actually editing, since your new system will be located at
/mnt/debinst, and you avoid accidentally editing the wrong file and messing up your backup system.
In this tutorial, we will edit the files from the outside. If you do it within a chrooted environment, simply leave out the /mnt/debinst at the beginning.
Step 2.2 - (Edit /mnt/debinst/etc/fstab)
The most important configuration is the fstab to make our new system aware of the partitions it has to mount. While it is possible to call the new installation with /dev/sdaX, you should use its UUID as reference in fstab. You can find the UUID of a partition via
blkid
As a reference you can copy your previous fstab to the new system
cp /etc/fstab /mnt/debinst/etc/fstab
Make sure you change at least the root partition.
Example:
## /etc/fstab: static file system information.
#
## Use 'blkid' to print the universally unique identifier for a
## device; this may be used with UUID= as a more robust way to name devices
## that works even if disks are added and removed. See fstab(5).
#
## systemd generates mount units based on this file, see systemd.mount(5).
## Please run 'systemctl daemon-reload' after making changes here.
#
## <file system> <mount point>   <type>  <options>       <dump>  <pass>

## Change this UUID here to the UUID of /dev/sdaX
UUID="1cdd87e4-37c7-4156-a3f3-9772b12c4769" /   ext4    errors=remount-ro 0       1

## swap was on /dev/sda2 during installation
UUID=99c1b9f9-dfc9-44a1-a9fd-69801759c8a9 none            swap    sw              0       0

## cdrom
/dev/sr0        /media/cdrom0   udf,iso9660 user,noauto     0       0
In this example, we swap UUID 1cdd87e4-37c7-4156-a3f3-9772b12c4769 with the UUID assigned to /dev/sdaX, which we found with the blkid command.
If you deleted your swap, make sure you also delete (or comment out) the line for the swap partition.
If you used encryption, make sure that /etc/crypttab is in place and updated.
Step 2.3 - Copy SSH information
Since you probably use SSH to connect to your machine, you want to be able to root into it again. Also, if your machine can access other servers via SSH, you want to retain this capability:
cp -a /root/.ssh/ /mnt/debinst/root/
Also, make sure that your SSH configuration is present for the SSH server:
cp -a /etc/ssh/sshd_conf.d/* /mnt/debinst/etc/ssh/sshd_conf.d/
This only works if you have already put your configuration into the sshd_conf.d directory. If it still resides in the sshd_conf file, you might either extract the information (recommended) or copy that file.
To avoid problems with the host_key identification, we make a backup copy of the host keys that were generated when we installed SSH and copy the host keys from the old system to the new system.
## Install zip if it is not yet installed on your system
apt install -y zip

## Backup the generated hostkeys
zip -r /mnt/debinst/root/old_hostkeys_bak.zip /mnt/debinst/etc/ssh/ssh_host*

## Remove the generated hostkeys
rm /mnt/debinst/etc/ssh/ssh_host*

## Replace with the hostkeys in your system
cp -a /etc/ssh/ssh_host* /mnt/debinst/etc/ssh/
Step 2.4 - Copy network information
As with the SSH configuration, we also update the network configuration:
cp -a /etc/network/interfaces.d/* /mnt/debinst/etc/network/interfaces.d/
Again, if your configuration resides in /etc/network/interfaces, you should consider migrating.
*Be aware that Debian changed its network interface names from version 10 to 11, so you might run into serious trouble.
An approach to avoid this is to use the network-manager on first boot and edit the interface definition only after you know the correct naming:
apt install network-manager
Step 2.5 - Set hostname
cp /etc/hostname /mnt/debinst/etc/hostname
You can choose a new hostname if you want to.
Step 2.6 - Mount/copy other directories
For all other directories (e.g. /home), you might want to consider a copy or a mount inside (/etc/fstab) from a different partition. Also, copy all required config files and data for other services that run on your machine like apache or mysql.
Step 3 - Finalize your setup
With all config files in place you can now finalize the installation. If you're not inside your new system, chroot to it again:
chroot /mnt/debinst /bin/bash
The next steps are pretty much the same as for a normal Debian setup.
Step 3.1 - Set time zone
dpkg-reconfigure tzdata
Step 3.2 - Set local
apt install -y locales
dpkg-reconfigure locales
Step 3.3 - Set keyboard layout
apt install -y console-setup console-setup-linux
dpkg-reconfigure locales
Step 3.4 - Set root password
passwd
Step 3.5 - Install kernel and bootloader
Now let's make it bootable. This step does not (yet) modify your current setup:
apt install -y linux-image-amd64 firmware-linux grub2
With a fully functioning Grub, let's check if it finds our new Linux. This step does not change your existing bootloader:
update-grub
The output should look something like:
Generating grub configuration file ...
Found linux image: /boot/vmlinuz-5.10.0-9-amd64
Found initrd image: /boot/initrd.img-5.10.0-9-amd64
Found Debian 10 on /dev/sda3
done
Carefully check if Grub detected both your new and your old system (in case something went wrong).
The example output indicates that Grub detected our new system and the old system /dev/sda3, which we can boot to in case our new system fails.
If everything is correct, you can finally write your bootloader to the beginning of the disk.
## This will override your boot sector! Make sure everything is okay before you do!
grub-install --root-directory / /dev/sda
Annotation
I recommend the security measures in Ref2 Timeout to boot back into the old system if your hoster does not provide you with a terminal to your server. With the netcup SCP we are on the safe side and if something goes wrong when booting your new system, you can select the old system in the Grub prompt.
Step 4 - Reboot to your new system
Finally
reboot
and you will find yourself in your new Debian.
If anything goes wrong or your system does not boot after all, you can restart your machine with an open console in the netcup SCP and select your old system to boot to in the Grub bootloader (text on the blue screen). From there you can figure out where the problems originated.
Conclusion
Your Linux server is just like your desktop. From time to time, it feels good to get rid of all the bulk accumulated over the years with a fresh new installation. With these simple steps, you can prepare a new system without interrupting the existing services too much. Especially if your data is already on another partition, generating a new system can be done in a matter of minutes.
License
Permission is hereby granted, free of charge, to any person obtaining a copy of this software and associated documentation files (the "Software"), to deal in the Software without restriction, including without limitation the rights to use, copy, modify, merge, publish, distribute, sublicence, and/or sell copies of the Software, and to permit persons to whom the Software is furnished to do so, subject to the following conditions:
The above copyright notice and this permission notice shall be included in all copies or substantial portions of the Software.
THE SOFTWARE IS PROVIDED "AS IS", WITHOUT WARRANTY OF ANY KIND, EXPRESS OR IMPLIED, INCLUDING BUT NOT LIMITED TO THE WARRANTIES OF MERCHANTABILITY, FITNESS FOR A PARTICULAR PURPOSE AND NONINFRINGEMENT. IN NO EVENT SHALL THE AUTHORS OR COPYRIGHT HOLDERS BE LIABLE FOR ANY CLAIM, DAMAGES OR OTHER LIABILITY, WHETHER IN AN ACTION OF CONTRACT, TORT OR OTHERWISE, ARISING FROM, OUT OF OR IN CONNECTION WITH THE SOFTWARE OR THE USE OR OTHER DEALINGS IN THE SOFTWARE.
Contributor's Certificate of Origin
By making a contribution to this project, I certify that:
-
The contribution was created in whole or in part by me and I have the right to submit it under the license indicated in the file; or
-
The contribution is based upon previous work that, to the best of my knowledge, is covered under an appropriate license and I have the right under that license to submit that work with modifications, whether created in whole or in part by me, under the same license (unless I am permitted to submit under a different license), as indicated in the file; or
-
The contribution was provided directly to me by some other person who certified (a), (b) or (c) and I have not modified it.
-
I understand and agree that this project and the contribution are public and that a record of the contribution (including all personal information I submit with it, including my sign-off) is maintained indefinitely and may be redistributed consistent with this project or the license(s) involved.